 Frete Grátis em todos os produtos
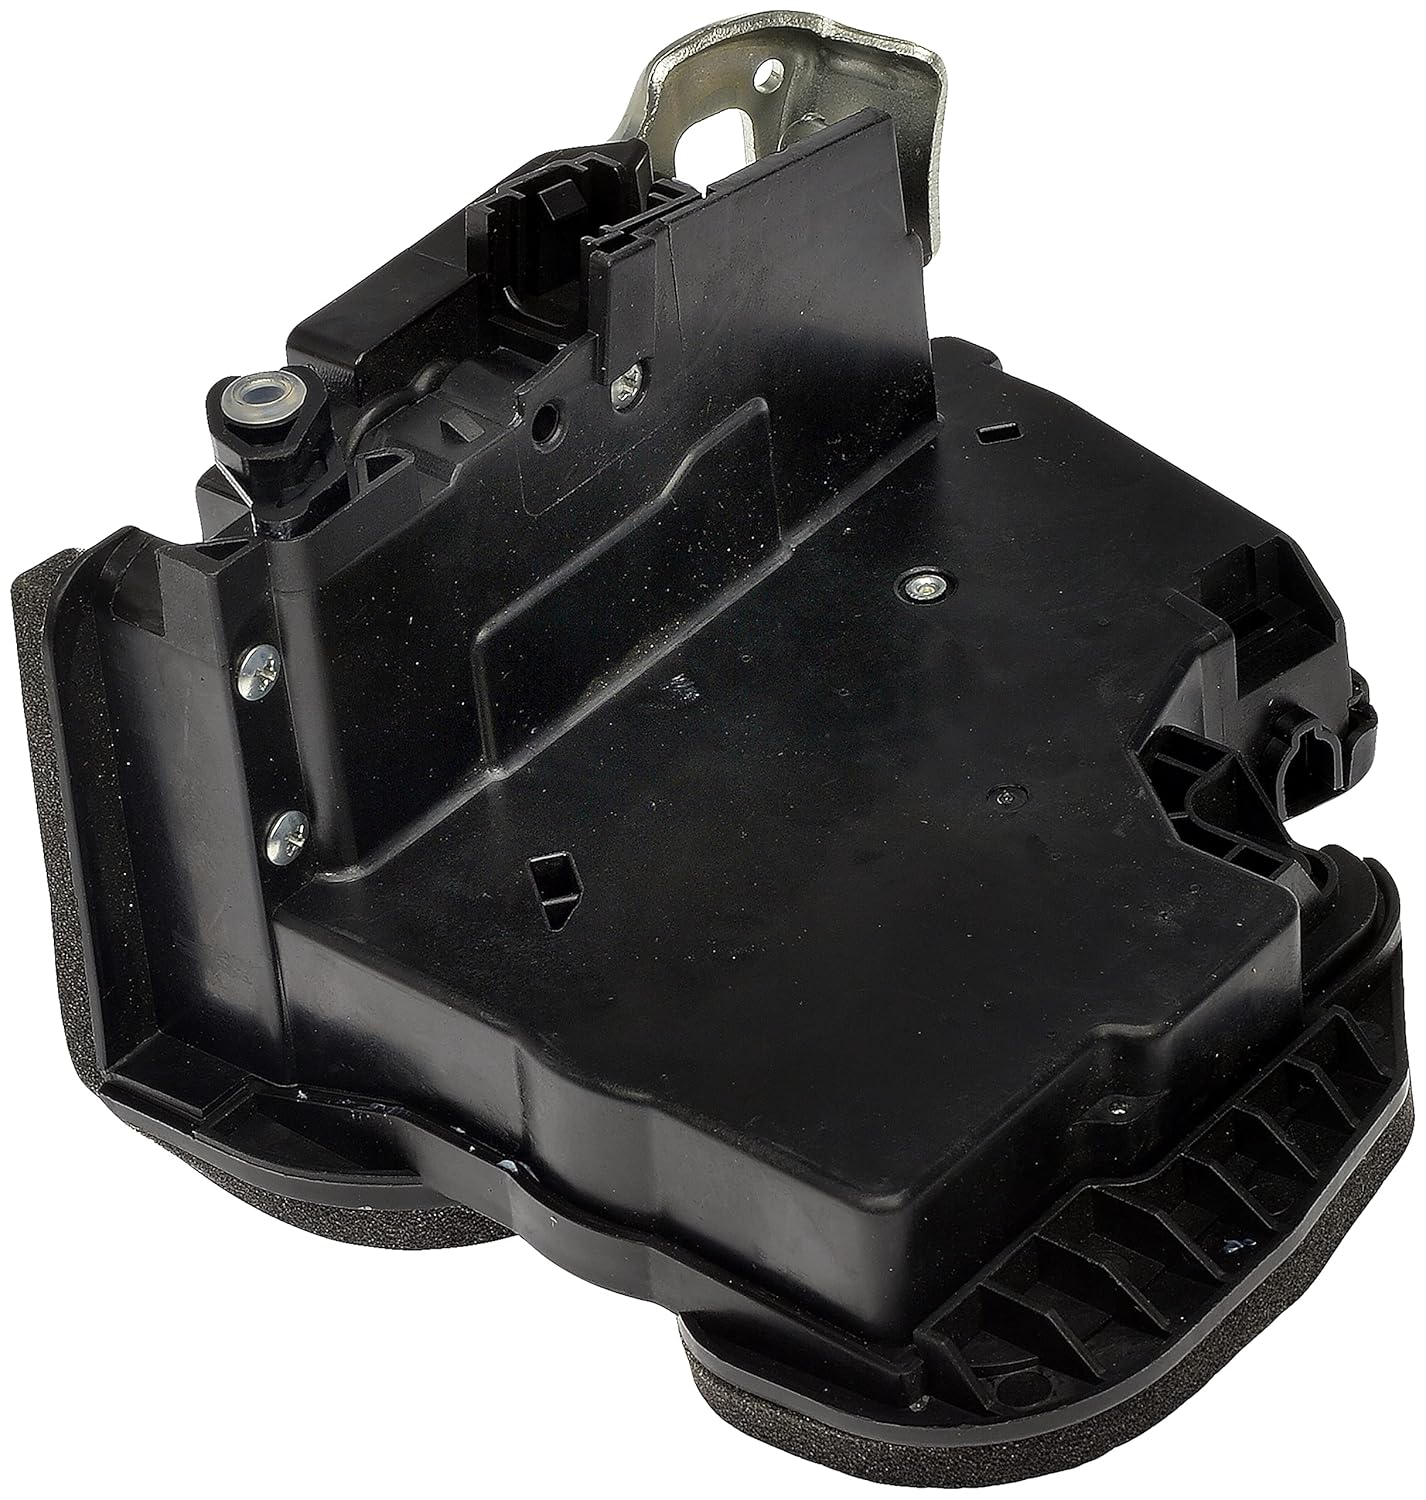


### Descrição do Produto
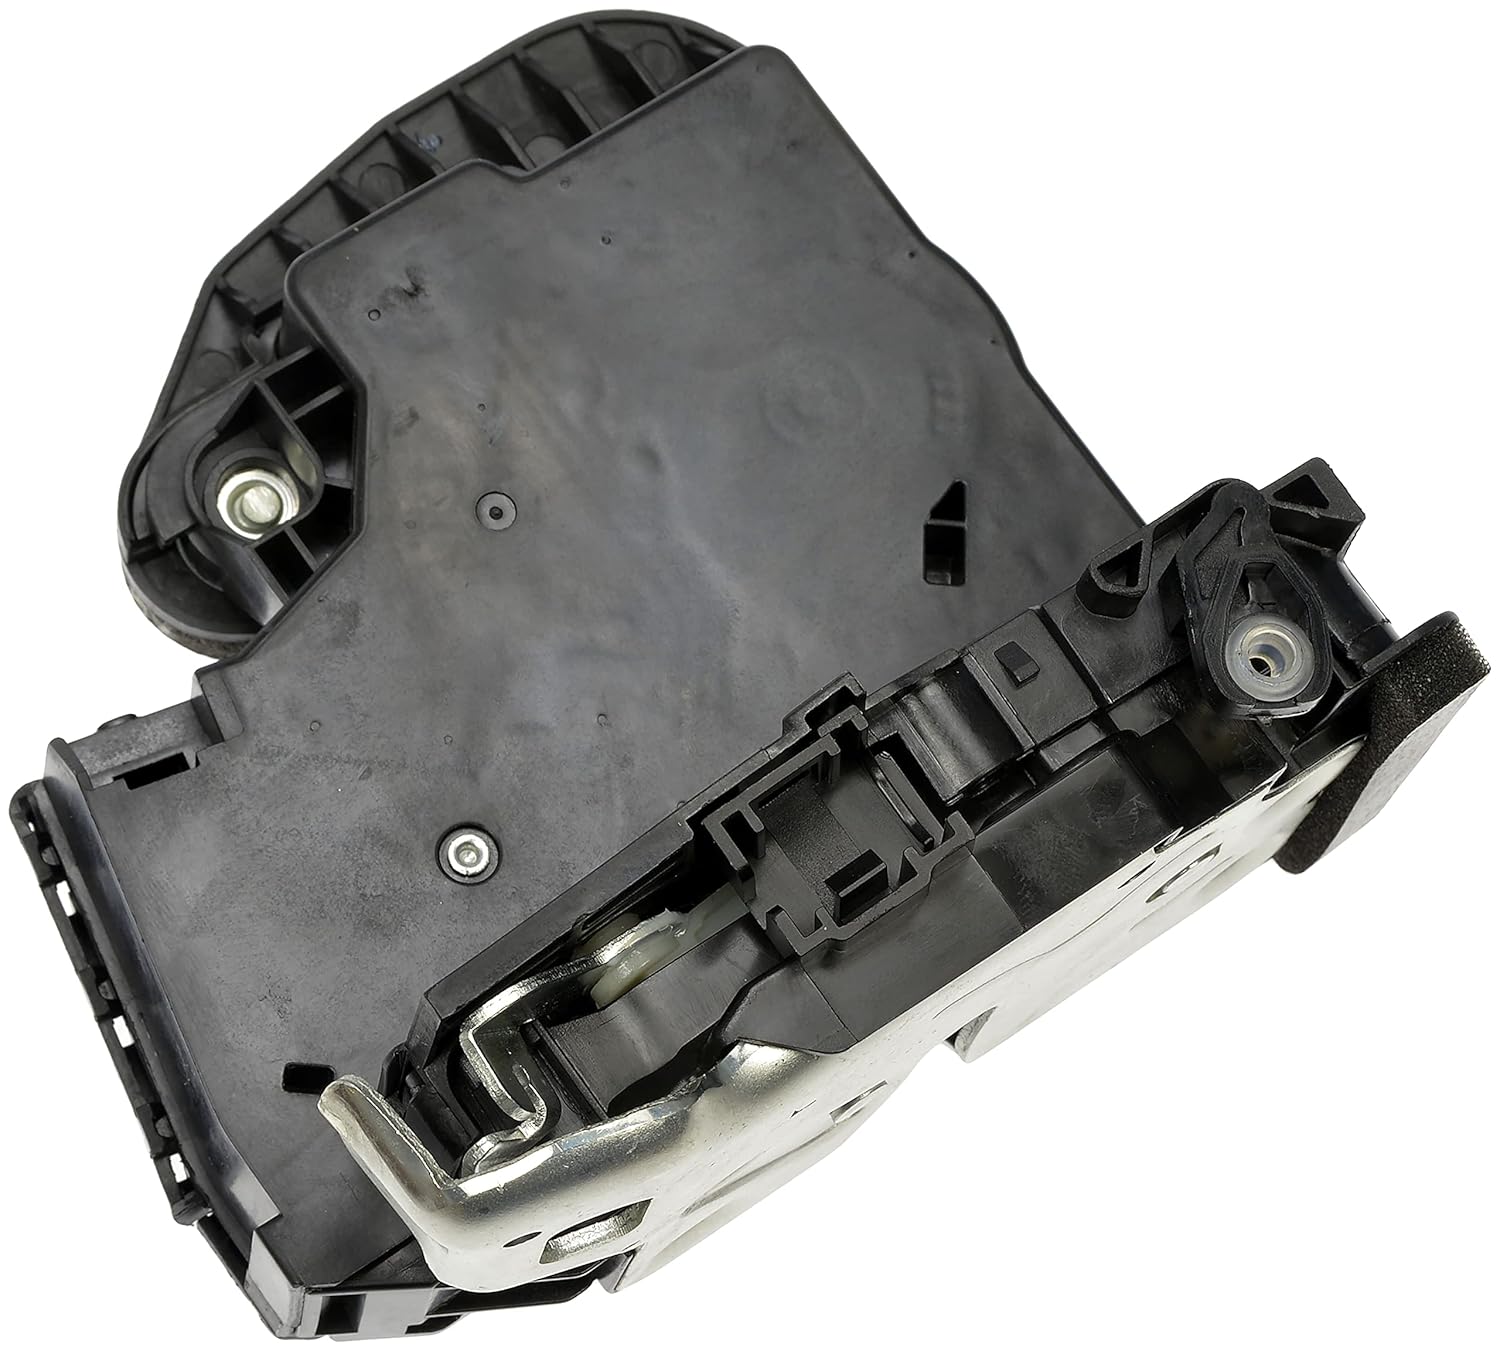
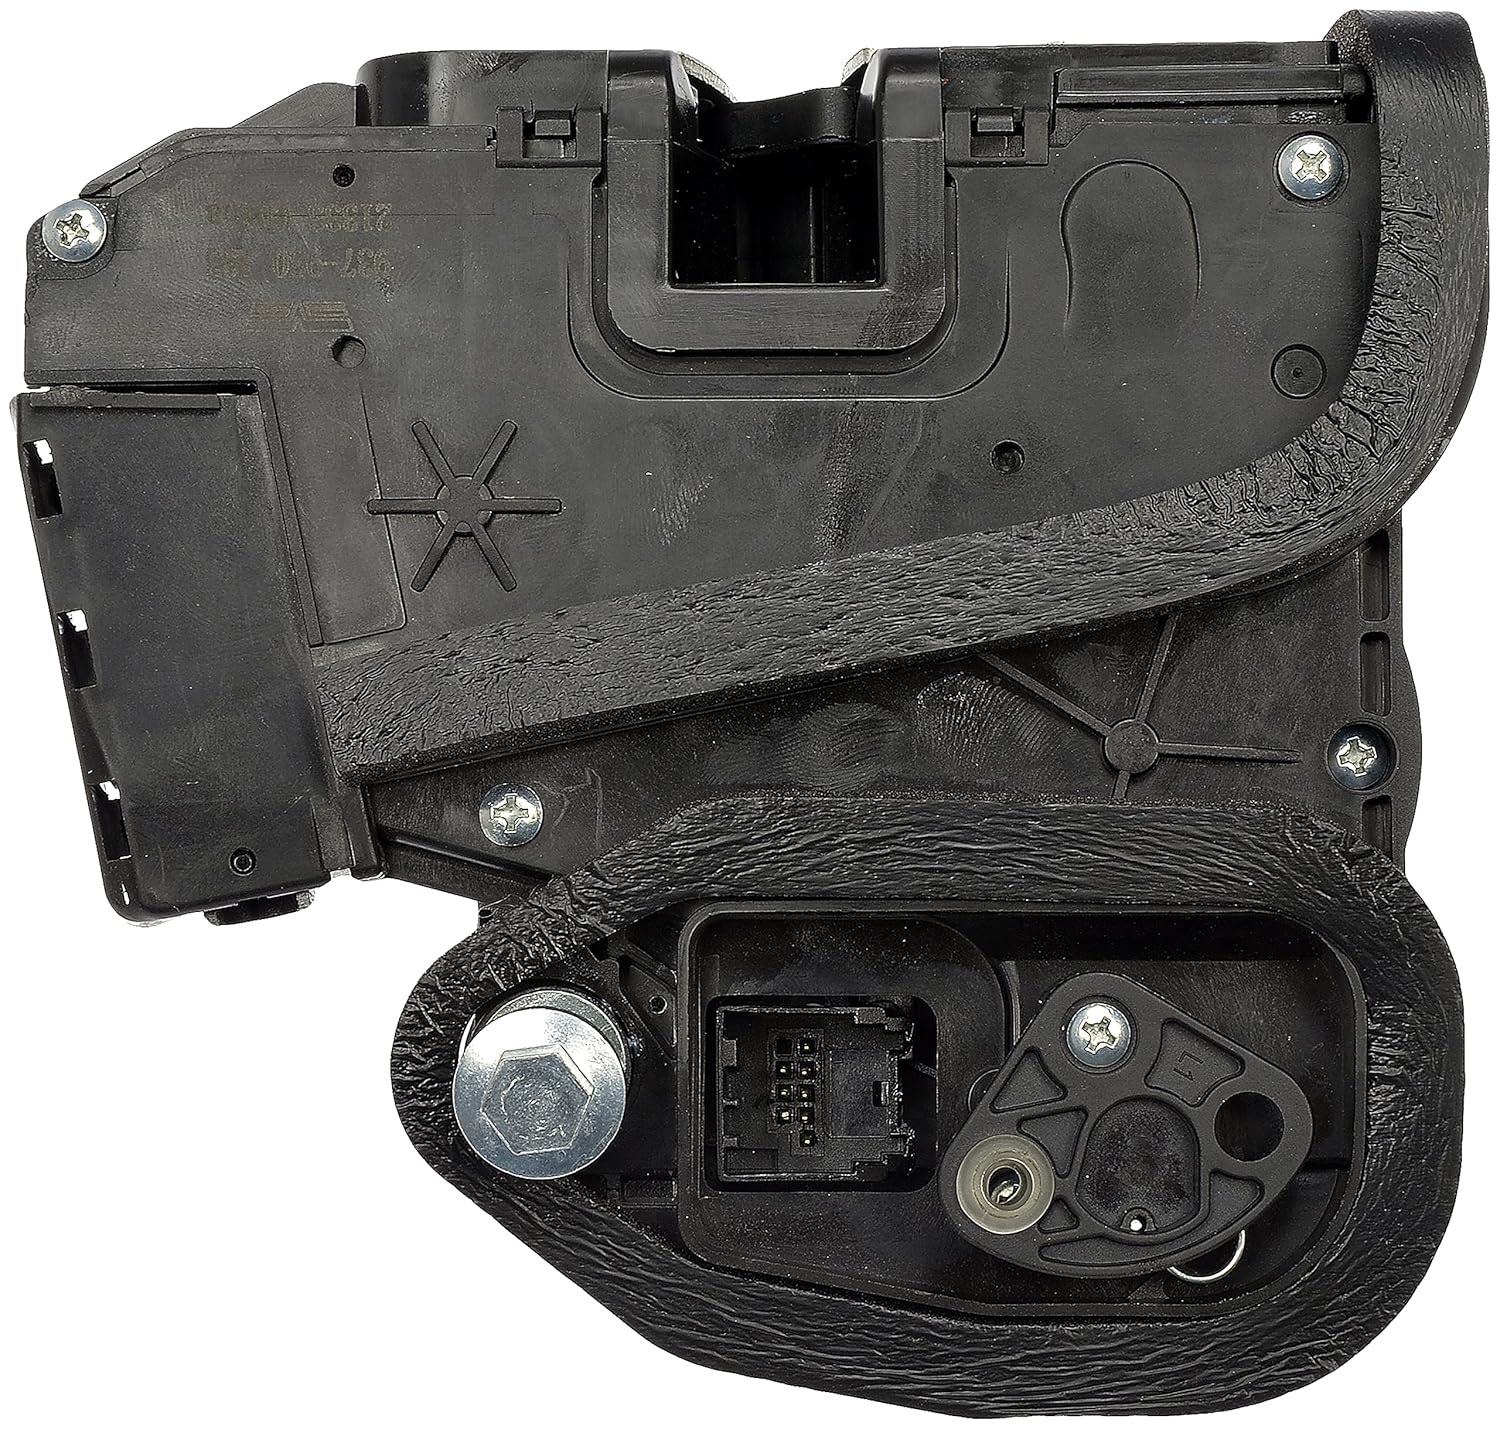
O Dorman 937-980 Motor do Atuador de Fechadura de Porta é a escolha perfeita para quem busca um componente de reposição que combine qualidade, segurança e durabilidade. Este atuador foi desenvolvido para atender às necessidades de veículos selecionados, oferecendo uma solução confiável para o funcionamento das fechaduras das portas. Com rigorosos testes de qualidade e desempenho, o Dorman 937-980 garante que você tenha um produto que não apenas funcione, mas que também mantenha a segurança dos ocupantes do veículo.
Este atuador é projetado para se encaixar perfeitamente em modelos específicos, assegurando uma instalação simples e sem complicações. A compatibilidade com o atuador original significa que você pode esperar um desempenho equivalente, sem a necessidade de adaptações. Além disso, o Dorman 937-980 atende a todas as normas de segurança, tendo passado por testes simulados de colisão, o que assegura que, em caso de acidente, a segurança do veículo não será comprometida.
A durabilidade é uma das principais características do Dorman 937-980. O produto foi submetido a testes de ciclo em portas reais, garantindo que ele resista ao desgaste do dia a dia e mantenha sua eficácia ao longo do tempo. Isso significa que você pode confiar em um reparo de longa duração, evitando a necessidade de substituições frequentes.
Para garantir que você está adquirindo a peça correta, utilize a ferramenta de garagem para inserir a marca, modelo e nível de acabamento do seu veículo. Isso assegura que o Dorman 937-980 será a solução ideal para suas necessidades.
### Instruções de Uso:
Para instalar o Dorman 937-980, siga os passos abaixo:
1. Desconecte a Bateria: Antes de iniciar a instalação, desconecte a bateria do veículo para evitar qualquer curto-circuito.
2. Remova o Painel da Porta: Utilize uma chave de fenda para remover os parafusos e clipes que seguram o painel da porta. Tenha cuidado para não danificar os componentes.
3. Desconecte o Atuador Antigo: Localize o atuador de fechadura antigo e desconecte os fios elétricos. Remova o atuador do suporte.
4. Instale o Novo Atuador: Coloque o Dorman 937-980 no lugar do atuador antigo e conecte os fios elétricos.
5. Recoloque o Painel da Porta: Após a instalação, recoloque o painel da porta e fixe-o com os parafusos e clipes.
6. Reconecte a Bateria: Por fim, reconecte a bateria e teste o funcionamento do atuador.
### Características do Produto
– Substituição Confiável: O Dorman 937-980 é testado em qualidade e segurança, garantindo um desempenho superior.
– Ajuste Perfeito: Projetado para se encaixar em modelos específicos, assegurando uma instalação sem complicações.
– Conformidade de Segurança: Testado sob diretrizes governamentais para simulação de colisão, garantindo a segurança do veículo.
– Reparo Duradouro: Ciclos de teste em portas reais asseguram uma longa vida útil do atuador.
– Compatibilidade Garantida: Ferramenta de garagem disponível para verificação de ajuste, facilitando a escolha do produto certo.
### Perguntas Frequentes (FAQ)
Pergunta: O Dorman 937-980 é compatível com meu veículo?
Resposta: Para garantir a compatibilidade, utilize a ferramenta de garagem para inserir a marca, modelo e nível de acabamento do seu veículo.
Pergunta: Como posso saber se o atuador está funcionando corretamente?
Resposta: Após a instalação, teste o atuador acionando a fechadura da porta. Se a fechadura abrir e fechar suavemente, o atuador está funcionando corretamente.
Pergunta: O que devo fazer se o atuador não funcionar após a instalação?
Resposta: Verifique as conexões elétricas e certifique-se de que estão firmes. Se o problema persistir, consulte um profissional.
Pergunta: O Dorman 937-980 vem com garantia?
Resposta: Sim, o produto geralmente vem com uma garantia limitada. Consulte o vendedor para mais detalhes sobre a cobertura.
Pergunta: É necessário algum equipamento especial para a instalação?
Resposta: Não, você precisará apenas de ferramentas básicas, como chaves de fenda e, possivelmente, uma chave inglesa, para a instalação do atuador.


airman2091 –
Very satisfied. Not necessarily an easy install but easy as you’re gonna get with one of these. Performance is as good as GM parts. I give it 5 stars
Wilmonger –
This worked for my 2017 GMC Acadia Denali. Just beware, it is very tedious and difficult to install. Remove inner door trim. Remove left window guide. Remove outer door handle. Squeeze the old one out by slightly bending the widow track to squeeze it out. Then install in reverse. Took a good 3 hours, and I could not find a video so I had to wing it. The item was a perfect match and is working fine though.
J T –
There are several videos on YouTube that show how to replace these. One of the more popular search results shows you how to remove the window, window track, and several other components. Comments on that video describe how to replace it without removing the window. I can confirm that this can be done, but if I had to do this again I probably would have just removed the window. The alternative method requires removing a piece of track that the window slides down into. Alignment tabs make reinstallation easy, so that wasn’t a big concern. The concern was the metal support piece that runs vertical inside the door panel that keeps you from just sliding the actuator out and in. That required a lot of flexing and prying that the comments assured me would be fine. And in the end it was, but it wasn’t comfortable. The worst part, however, was disconnecting the rod going from the manual key lock cylinder to the top of the actuator (for backup entry). The rod curves at the tip, and since there is hardly any room to tilt the actuator, I ended up having to maneuver some needlenose and lockjaw pliers in there to bend the rod. Then when reinstalling, I had to try to bend the tip back in place, but it’s definitely not as secure as it was before. The rod itself is bent now, so the manual unlocking is a little less smooth. But is still works. I was concerned after installation because the push button on the exterior was not operating the actuator, even though the buttons and the keyfob were operating it. The back passenger door had the same issue, even though I didn’t touch that one. I read that the antennae for the keyless entry was in the front door handle and shared with both doors on that side, and that I likely didn’t plug the connector back in. I removed the door panel again and verified it as still connected. I then played with all of my settings and eventually found a combination that fixed the issue. In REMOTE LOCK, UNLOCK, and REMOTE START menu, choose ALL DOORS for REMOTE DOOR UNLOCK, choose OFF for PASSIVE DOOR LOCK. In POWER DOOR LOCKS menu set AUTO DOOR UNLOCK to ALL DOORS. None of these settings really make sense for fixing the issue, but it’s working now so I’m not going to change them again. The “trick” you’ll read about to hold unlock and lock buttons down on the keyfob is the way to toggle the keyless entry on and off, so that didn’t work for my issue. One last problem is the plastic knob that sticks out of the top of the door panel doesn’t sit flush when locked anymore. I didn’t change that connecting rod at all, and installed the actuator in the same position, so there must be a little difference in this part that causes that connection to sit a little higher. Not a dealbreaker for me, even though I do like to drive with my elbow resting in the area.
answerman –
The door latch cable needed to be modified to be able lock into the latch assembly as the aftermarket latch pocket needs to be a little deeper as cable bottoms out before locking in place. Pocket not deep enough to allow cable to lock in place. Should have taken pictures to share. Latch works as well as original.