 Frete Grátis em todos os produtos
- Improved replacement – this window regulator and motor assembly features enhancements over the factory part for greater reliability
- Failure-resistant design – features cable tension springs to resist cable reel binding from medium-term elongation
- Enhanced components – also includes cable guides to eliminate high cable tension and reduce cable stress
- Quality engineering – designed in the United States and backed by decades of automotive aftermarket experience
- Ensure fit – to make sure this part fits your exact vehicle, input your make, model and trim level into the garage tool
- Please check the “Amazon Confirmed Fit” bar at the top of this page before buying product to ensure this product works for your vehicle. If the “Amazon Confirmed Fit” bar has an “i” in a blue circle, this product has additional notes. Please hover over the “i” on the bar to see notes before making your purchase.


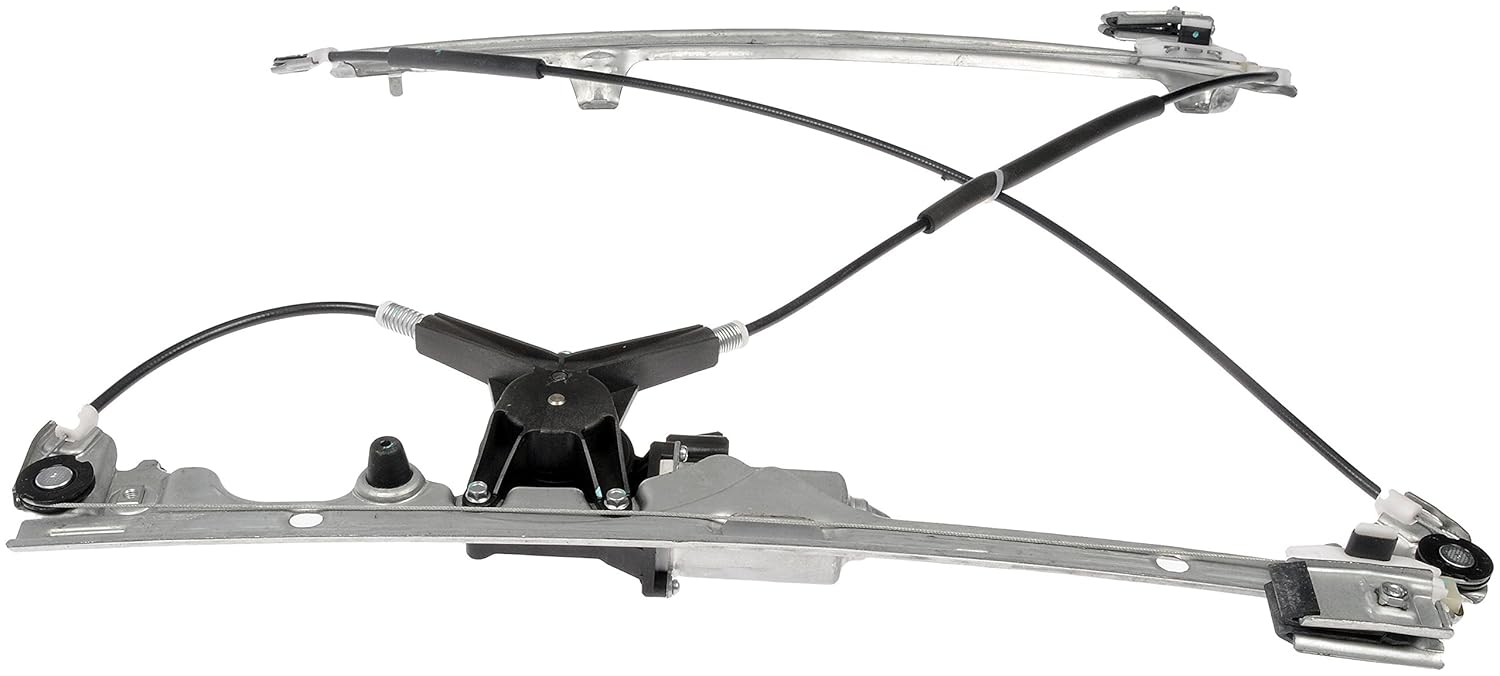
 A-Premium Electric Power Window Regulator with Motor Compatible with Chevrolet Blazer 1987-1991 GMC Jimmy 1982-1991 Front Right Passenger Side
*$1,009.00
A-Premium Electric Power Window Regulator with Motor Compatible with Chevrolet Blazer 1987-1991 GMC Jimmy 1982-1991 Front Right Passenger Side
*$1,009.00
 A-Premium Electric Power Window Regulator Without Motor Compatible with Ford Fusion 2006-2012 Lincoln MKZ 2007-2012 Zephyr Milan Sedan Front Left Driver Side
*$673.00
A-Premium Electric Power Window Regulator Without Motor Compatible with Ford Fusion 2006-2012 Lincoln MKZ 2007-2012 Zephyr Milan Sedan Front Left Driver Side
*$673.00
Frete Grátis em todo o BrasilProduto Original Importado dos EUA
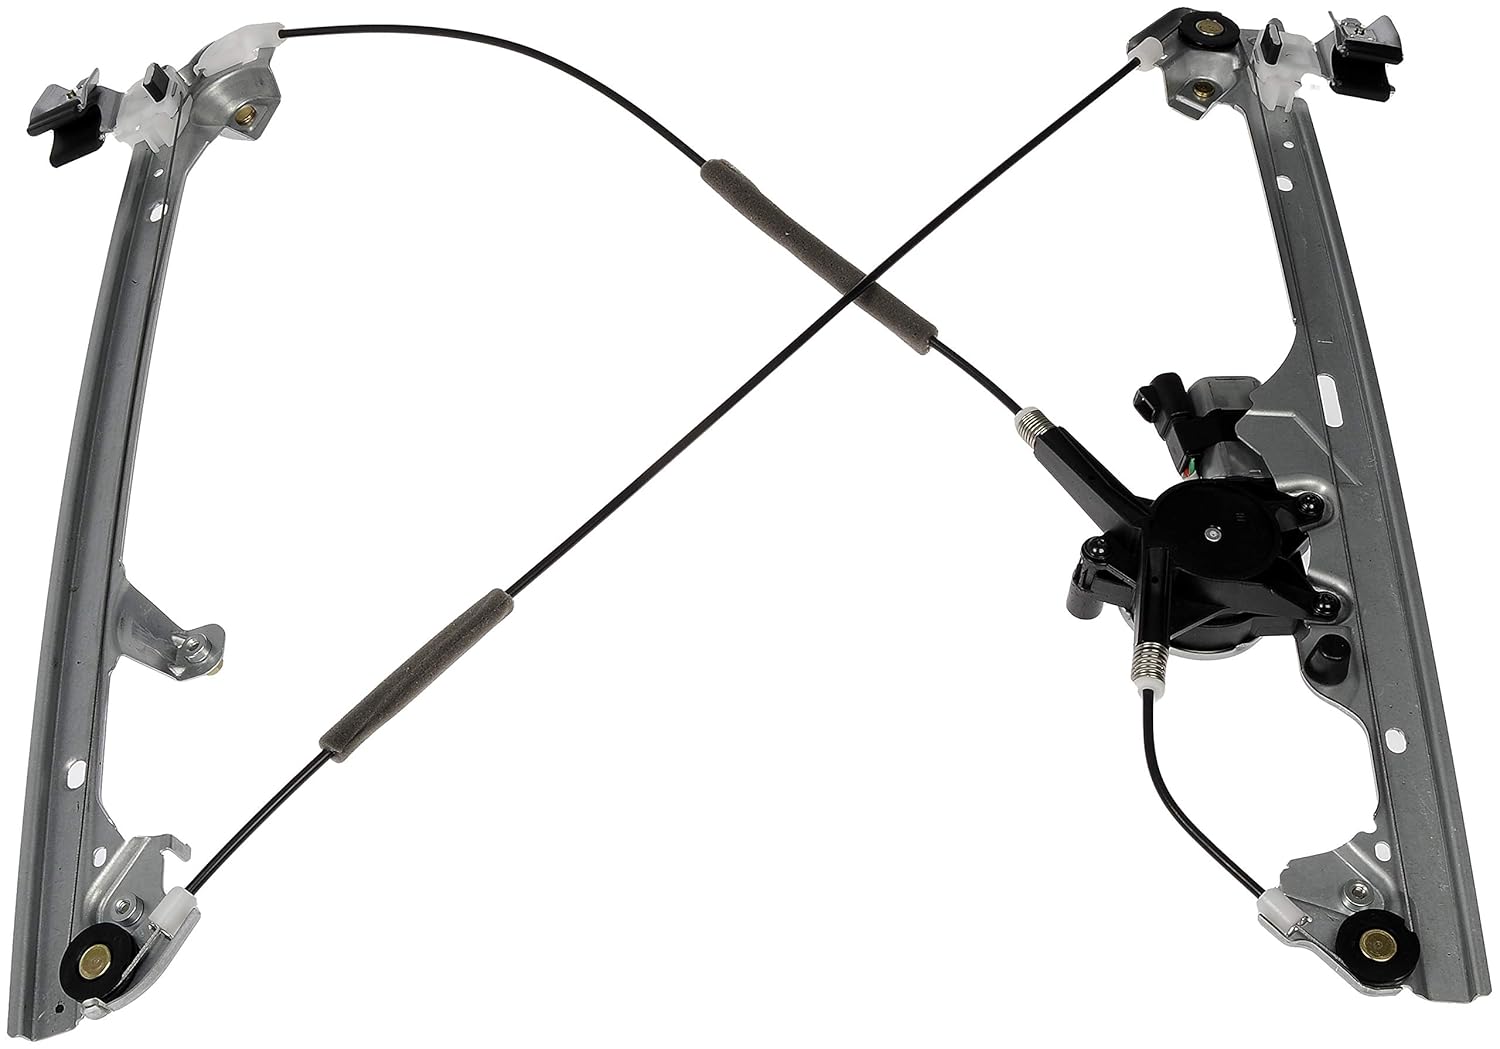
Dorman 741-645 Front Passenger Side Power Window Regulator and Motor Assembly Compatible with Select Cadillac / Chevrolet / GMC Models (OE FIX)
*$849.90
Informação adicional
| Manufacturer | Dorman Products |
|---|---|
| Brand | Dorman |
| Model | Dorman 741-645: Power Window Regulator And Motor Assembly |
| Item Weight | 4.54 pounds |
| Product Dimensions | 25.2 x 4 x 15.8 inches |
| Country of Origin | Taiwan |
| Item model number | 741-645 |
| Exterior | Machined |
| Manufacturer Part Number | 741-645 |
| OEM Part Number | 11A15, 1552-1739R, 52101, 52401, 660197, 741645, 82-179AR, 82122, 82179AR, SK741645, WL41645, WLA5001, WPR0510RM, WR0021, WR51001, 15077854, 15095844, 15101786, 15175190, 15755430, 15765392, 15842437, 19120096, 19120847, 19179942, 20914718, 20945139, 25866184, 25885809 |
| ABPA Partslink Number | GM1351110 |
| Hollander Number | 125-1939R |
| Special Features | Easy to Install |
| Date First Available | July 7, 2004 |


لا يصلح لموديلات 2015 –
للاصلاح
Jason B –
Excellent quality fits perfect easy install powerful motor!! I would recommend to anybody needing to replace their window regulator. I am not AI I don’t drive a Tesla or an electric car. I’m a real human being that drives a diesel truck.
richard –
Works great on my 2004 Z71. Exact fit. Pre greased, but I still added some.
Jeremy –
Product worked great. No complaints. Solid as OEM and came pre-lubricated.
Jay –
Great fit, took about 30 minutes to install. As other reviews have said, a screwdriver/prybar, 7mm socket, and a 10mm socket are all you need.
To remove the door panel, pop off the sideview mirror cover, take out the bezel for the door lock, and remove the bezel for the door handle. All of them are held in with clips, so use the screwdriver to pry them out. Unscrew the bolt behind the door pull/arm rest with your 7mm socket. Lift the door panel straight up and out of the hook slots. Before pulling it away too far, disconnect the little marker light at the bottom, and the switch connectors. To make things easy later on, pull the switch module out of the door panel by releasing the 4 tabs that lock it in on either side, and slide it out. Peel back the vapor barrier on the door, but leave it hanging on the door, because you have to reapply it after. I found it easy enough to remove the door handle at this point so it wasn’t in my way. Just pry off the spiral clip holding the rod to it, then undo the 10mm bolt holding it on. Slide the assembly forward, and it comes right off. This may or may not be a necessary step, I don’t remember. I just did it instinctively.
Tape your window in the up position to the door frame. Loosen the 2 bolts that hold the window to the regulator. Plug the switches back in and roll the “window” down so it releases the clamps from the window. Now disconnect the switches again, disconnect the connector going to the window motor. At this point, it’s pretty much as simple as pulling the 5 or 6 bolts that hold the regulator rails in place, and slipping them out. It may take some maneuvering, but there’s plenty of room.
When putting the new regulator in, make sure you’ve pulled all the bolts out before hand, and remove the 2 nuts at the bottom. I found it easier to put the motor side in first, then carefully collapse the cable to slip the neutral side in. Line the studs up with the holes in the door at the bottom of the rails, and put the nuts on (loosely). Now you should be able to pivot the top into place to install the new bolts. If I recall, I think I needed to use 1 of my old bolts (near the motor support) but for the other holes, I used the new ones. Tighten everything up, and plug in the motor. Now connect the door switches again, and run the motor up so that the clamps seat against the window. It’s a good idea to reach in and push them up snug against the window when tightening the bolts here. Make sure that rubber pad is in place when you do it. Also, make sure the rubber pad from the previous regulator is removed. One of mine was stuck to the window when I pulled the old regulator out.
Assembly is reverse of disassembly. Don’t forget to reconnect the rod for the door handle. I have years of automotive experience, but this is my first window regulator replacement. Total time, 30 minutes. Tools were a 10mm socket nut driver, 7mm socket nut driver, and a standard flat head screwdriver. These rails are greased, so keep some shop rags or paper towels handy when you do all this.
Performance: Rolled my window up and down for the first time in 9 years. 😀 Motor didn’t seem like it was struggling, and it moves faster than my factory drivers side motor. Needless to say, that one is probably near the end of its lifespan too. I’d be more than happy to replace it with this product.
For people tackling this for the first time, or people with less experience. It may look intimidating at first, but take your time, and you’ll be fine. There’s nothing that can go back in the wrong place (all connectors are keyed). I would say for the less experienced, this should take less than an hour. I wrote this from memory, so if I missed anything, I apologize.
Amazon Customer –
Received on time and ready to install. Installed on 2005 Yukon Denali. Working fine. Will buy again.
Labrador –
I should start off by saying that I am by no means a mechanical genius. However, once the inner trim and door panel was removed I was able to easily remove the regulator that had failed. Now comes the surprise: I was able to place the new regulator in position and secure it in about 5 minutes. I then tightened the bolts holding the window in place easily. I should note that there is a torque listed for those bolts but my torque wrench does not go that low so I estimated the pressure I applied. Window in place and wires connected a quick check to ensure everything was working properly. Now replace the panel and inner trim. Job done in about 30 minutes. Less cost and more satisfaction than paying to have it done. If the need arises I would not hesitate to purchase one of these for another of my vehicles.
Kaiser –
This is a great product for the price. My dad was having problems with the driver side window motors going bad like once a year so we tried everything and after hearing about the window tracks in these trucks going bad I decided to take a gamble on just replacing the whole thing and I’m so glad I did. No matter what we did the motor was having problems after about half way with a new motor sometimes we had to pull on it while pushing the button up which shouldn’t happen. After installing the thing works so good it’s never when up that fast since he’s owned it. My advice is if you own a Tahoe,suburban,Denali or Silverado to just get this complete kit it saved so much time and money I would definitely buy again no hesitation
scrogers –
This was the exact part I needed to fix my ’02 Suburban drivers window. Mine just got stuck in place one day. Upon tearing into it, it appears one of the old regulator cables had begun to fray at some point, and then got worse until it got all jammed/bound-up in the pulley/sheathing mechanism at the bottom.
As others have said, this is a direct fit and rather easy to install. Mine also included the sheet noting that the Dorman version would be missing one bracket compared to the OE one, but doesn’t seem to make any difference. There are a couple little differences between this and the OE one (studs and nuts at the bottom vs bolts), but I think it’s all for the better. I did have to use one of my OE bolts for attachment point nearest the motor, but all other points came with new hardware (nuts/bolts) out of the box.
Just a note if your window is stuck down or in the middle- All the instructions and videos start with “put the window all the way up” which I could not do because it was frozen/jammed in place. You then must first manually raise your window all the way up by loosening the two 10mm bolts clamping the window and carefully sliding it up by hand (then tape it). That said, depending on where your window is stuck, it could be difficult to access one (or both) of the bolts clamping the window. I found a small 10mm open-end/box wrench (or better yet, a ratcheting box wrench) could be slid up or down the inside of the door onto the bolt and loosened. The door is clearly designed to allow you to loosen/tighten the clamp bolts with the window all the way up, but it’s possible, albeit a little tricky, to loosen it if stuck in the middle.
I have several other Dorman products on my ‘burban already and am again pleased with this and Amazon. I’m sure I’ll get the passengers version when that side stops working in the future. As others have said, with a few tools this is a pretty quick job. Watch some videos to get the best idea first, but this DIY is totally worth it over bringing it in somewhere.
Anon –
Bought this for my ’03 tahoe due to motor failure. This assembly fits exactly, and thanks to a good youtube video got exact steps to remove old and install new efficiently the first time. Now my window works again! Thank you Dorman for a history of affordable and working replacement parts!