 Frete Grátis em todos os produtos


### Descrição do Produto
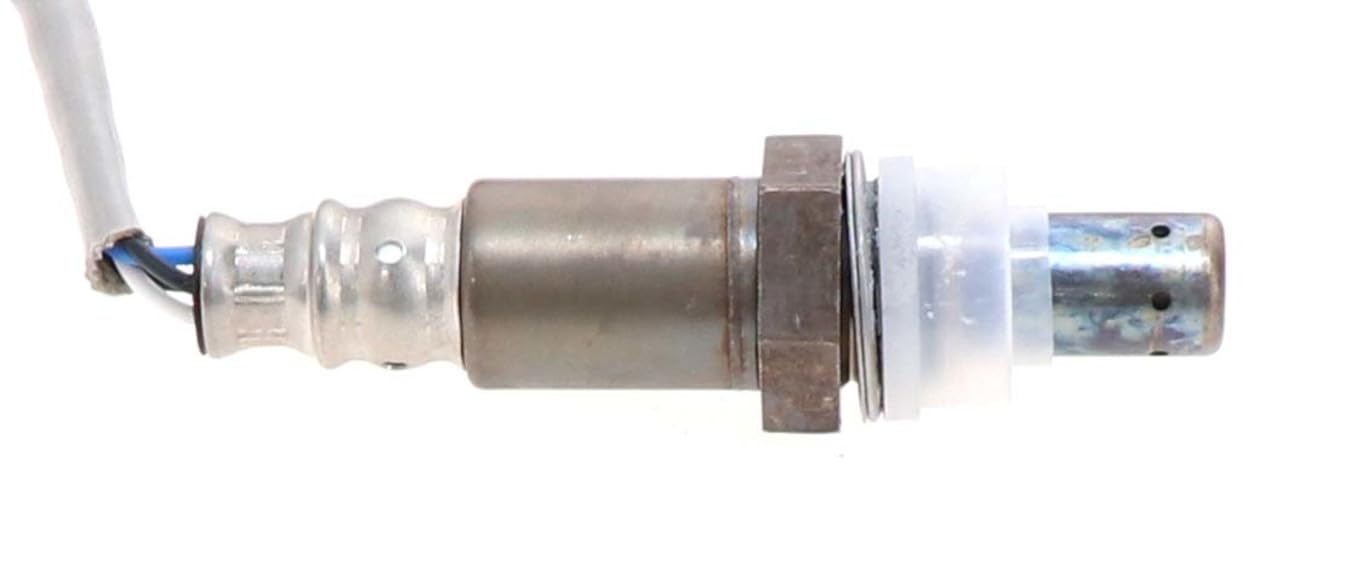
O Sensor de Oxigênio Aquecido Denso 234-4509 é uma solução de alta performance projetada especificamente para veículos Lexus e Toyota V6, abrangendo os modelos de 2004 a 2016. Este sensor, com um cabo de 25,5 polegadas, é um componente essencial do sistema de exaustão, responsável por monitorar a quantidade de oxigênio presente nos gases de escape. A precisão na detecção de oxigênio é crucial para otimizar a mistura de ar e combustível, resultando em uma combustão mais eficiente e, consequentemente, em um consumo de combustível mais econômico.
Construído a partir de materiais de alta qualidade, o Denso 234-4509 garante durabilidade e resistência a condições adversas, como altas temperaturas e corrosão. Seu design universal permite uma instalação fácil e rápida, tornando-o uma escolha ideal para quem busca eficiência e confiabilidade. Este sensor não apenas melhora o desempenho do motor, mas também contribui para a redução das emissões de poluentes, alinhando-se às normas ambientais atuais.
#### – Instruções de Uso:
Para instalar o Sensor de Oxigênio Aquecido Denso 234-4509, siga os passos abaixo:
1. Desconecte a Bateria: Antes de iniciar a instalação, desconecte a bateria do veículo para evitar qualquer curto-circuito.
2. Localize o Sensor: Identifique a posição do sensor de oxigênio no sistema de exaustão do lado direito do motor.
3. Remova o Sensor Antigo: Utilize uma chave de soquete para remover o sensor de oxigênio antigo, tomando cuidado para não danificar as roscas.
4. Instale o Novo Sensor: Enrosque o novo sensor Denso 234-4509 na mesma posição, garantindo que esteja bem fixo.
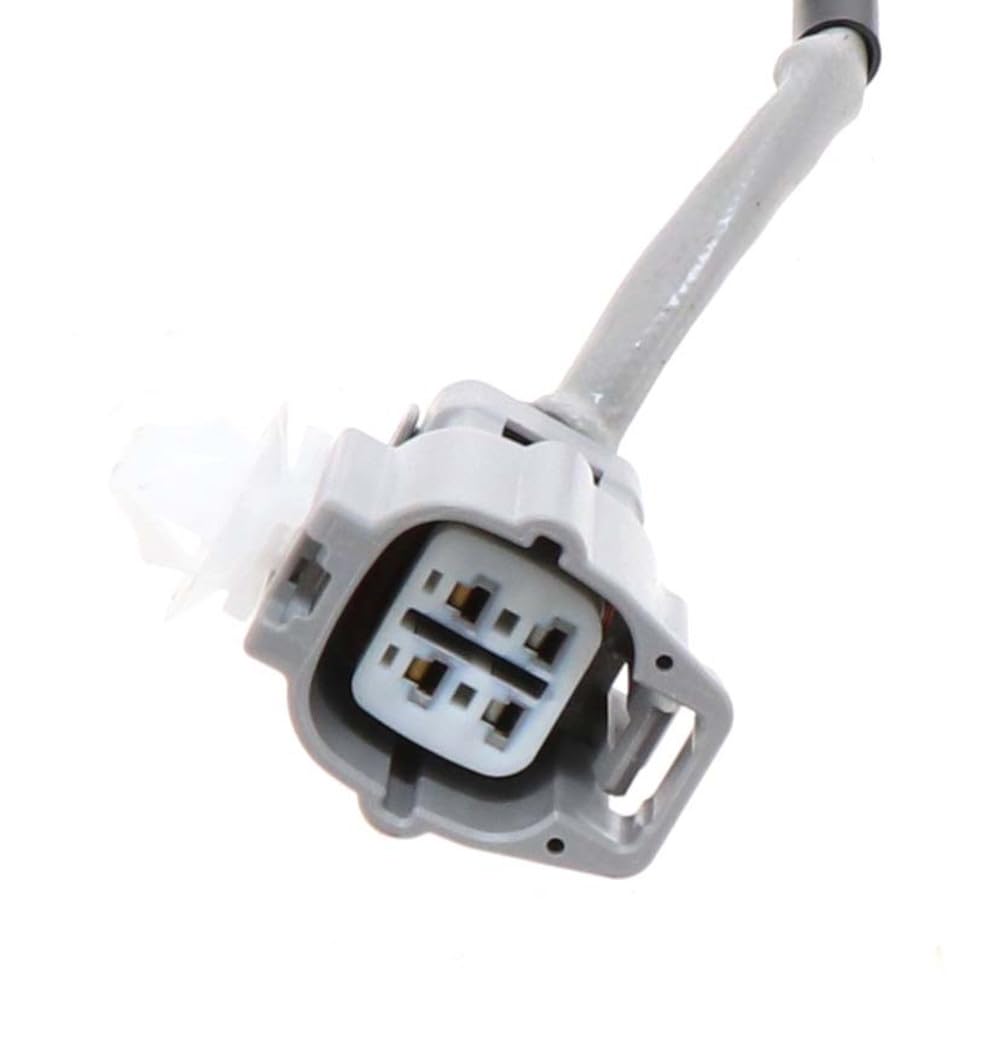
5. Conecte o Cabo: Conecte o cabo do sensor à fiação do veículo, assegurando que a conexão esteja firme.
6. Reconecte a Bateria: Após a instalação, reconecte a bateria e ligue o motor para verificar se o sensor está funcionando corretamente.
#### Características do Produto
– Tipo de Ajuste: Ajuste Universal
– Consumo de Combustível Eficiente: Melhora a eficiência do motor, resultando em menor consumo de combustível.
– Material de Alta Qualidade: Construído com materiais resistentes a altas temperaturas e corrosão.
– Detecção Precisa: Projetado para detectar com precisão a quantidade de oxigênio no sistema de exaustão, otimizando a mistura de ar e combustível.
### Perguntas Frequentes (FAQ)
Pergunta: O Denso 234-4509 é compatível com meu veículo?
Resposta: Este sensor é projetado para veículos Lexus e Toyota V6 dos anos de 2004 a 2016. Verifique o manual do proprietário para confirmar a compatibilidade.
Pergunta: Como posso saber se meu sensor de oxigênio está com defeito?
Resposta: Sinais de um sensor defeituoso incluem aumento no consumo de combustível, falhas no motor e luz de verificação do motor acesa. Um diagnóstico adequado pode confirmar a necessidade de substituição.
Pergunta: A instalação do sensor é difícil?
Resposta: A instalação é relativamente simples e pode ser realizada com ferramentas básicas. Siga as instruções de uso para garantir uma instalação correta.
Pergunta: O que acontece se eu não substituir um sensor de oxigênio defeituoso?
Resposta: Ignorar a substituição pode levar a um desempenho ruim do motor, aumento nas emissões de poluentes e danos a outros componentes do sistema de exaustão.
Pergunta: O sensor Denso 234-4509 vem com garantia?
Resposta: Sim, o produto geralmente vem com garantia do fabricante, mas é importante verificar os termos específicos no momento da compra.


Amazon Customer –
Came on time, was exact fit and fixed my check engine light as expected. Includes a small copper thread sealant which saved me another purchase.
Chris Bremner –
Been installed for 3 months now, no more codes!
Harold Duong –
It came in different Denso Part # on the unit. May be new update from Denso. But it fixed our 2004 Lexus RX330 code P420 Bank 1 (by fire wall side). Don’t change the cat converter first, change this first!
Rana D. –
This sensor was exact fit for my 2006 Lexus RX330, its been working perfect for several months months now. Definitely recommend.
GDB –
I had a P0037 code on a 2005 Lexus RX330. That code also triggered the VSC/Traction Control lights. The car was noticeably down on power/smoothness and fuel consumption had also increased. This Denso oxygen sensor fixed it all and the car runs much smoother now and fuel mileage has returned to normal. I compared the factory Toyota/Denso sensor to this replacement Denso one and they are pretty much exactly the same, including all the mounting clips. It was a no hassle direct installation, took about 20 minutes start to finish. I did jack up the left side slightly for a little extra clearance and used a 7/8 Craftsman open end wrench(approx 11 inches long), no need for the special socket, there is plenty of clearance for the wrench. I did not use any heat, penetrating solution, etc and the old sensor popped loose with just a bit of force, about the same as loosening a lug nut. The leverage from the wrench is much better than that of a ratchet /socket.
Mish –
This was a perfect fit for Toyota Highlander Limited 2012 V6. I installed it, cleared the error code and till date no more check engine indication on the dashboard
Charles S. –
This was a direct replacement for the oxygen sensor on my 2007 Lexus RX350, Canadian built SUV. Note that this part is for bank 1, sensor 2.
The sensor is located under the vehicle, aft (downstream) of the cat converter, in the exhaust pipe, closest to the driver’s side.
Denso (brand) are the same folks that supply many of original Lexus factory parts for this vehicle. It is a perfect match, right down to the wire length and clip fastener spacing!
Easy to replace! Once under the vehicle it takes 20 minutes, including the time for the spray rust penetrant (Pb Blaster) to make removal a breeze.
Tools you will need:
– Jack and jack stands, unless you are skinny! NEVER go under a vehicle supported by a jack alone!
– 7/8 open-end wrench (Save your money and don’t buy the special oxygen sensor tool. I bought it and didn’t use it)
– Flat blade screwdriver to pry out clips securing cable. (Cable comes with new clips, so don’t worry)
– Eye protection.
– Wire cutter (Optional, but snipping the old wires close to the sensor makes removal more pleasant)
– Spray rust penetrater in a can. (I like Pb Blaster)
– Vehicle computer code reader/reset tool (I own one, but many of the auto part chain stores will reset free of any charge)
Normal thread (righty, tight – lefty, loose). Snug-up, but don’t be a gorilla. 35 foot pounds, if you really want to put a torque wrench to it. Make sure the car is at ambient temperature. This is important for easy removal.
The dealership quoted $400-$500 for this repair. I did for under $100. If you can change your
tire, this is only slightly more difficult.
No more check engine light or poor gas mileage. The part is working very well for me. I hope it does for you as well!
Gabrielle Duncan –
This does not work on a 2009 lexus rx350. It is listed as the correct part but the wiring harness connector is wrong. This sensor has a female socket, same as the vehicle wiring harness so you cant plug it in.
NTK 24677 shows a male socket, ordered that after returning this.
Weatherwiser –
I ordered this sensor for my 2005 Toyota Highlander V6 AWD after having an auto parts store chain scan for an error code I was receiving (Check engine light and VSC both illuminated). I was getting code P0037 which indicated Bank 1, Sensor 2 on the passenger side after the catalytic converter. I also ordered a 22mm offset wrench and glad I did because it would have been extremely difficult removing the sensor without it. My car has 180,000 miles and this was the first time it was replaced. The sensor is the identical Original Equipment Manufacturer (OEM) that Toyota still uses on their vehicles; I stayed away from a cheaper, generic sensor. The hardest part is getting the sensor to “break free” since its been on the vehicle for over 11 years. I also sprayed it with liquid wrench a few times days before I attempted to remove it. I also drove home about an hour and removed it within about 10 minutes after shutting the car off so the exhaust pipe was still pretty hot ( wear long sleeve shirt). I didn’t use a lift or ramps and it’s not too hard to replace since the Highlander sits high and has enough clearance underneath. The check engine light and VSC light extinguished after starting the car the next day while leaving work after I had driven about 30 miles with the new sensor installed. I was getting ready to go back to the auto store on the way home if it didn’t reset itself to have them clear the code or maybe order a code scanner, but it wasn’t necessary. 5 stars on this part based on getting an OEM replacement at a great price and quick shipping. I hope this one will last another 180k miles. If anything, Amazon could improve the packaging since a bubble lined envelope does not appear to adequately protect a small, electrical and sensitive sensor part that should not be dropped or handled roughly.